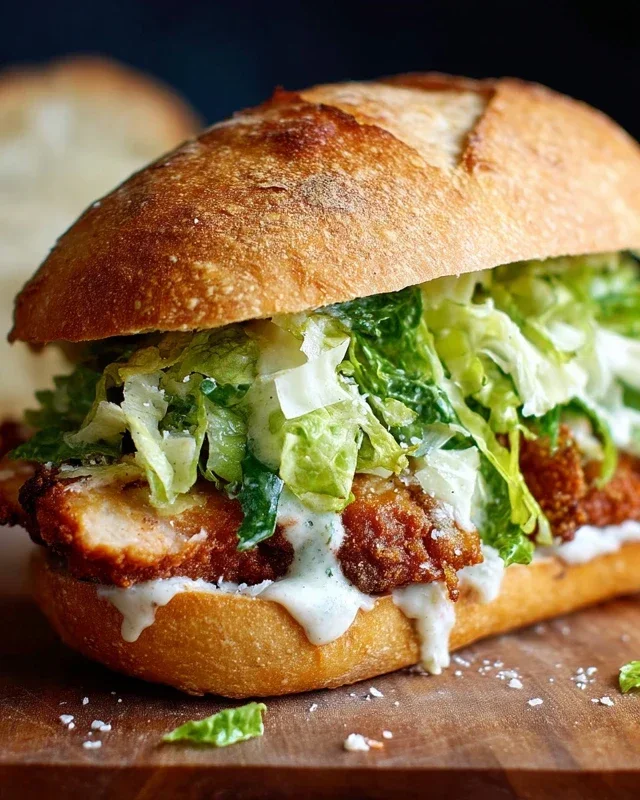
Crispy Chicken Caesar Sandwich-Best Ever Recipe
Crispy Chicken Caesar Sandwich. Oh, how I love this ultimate sandwich! It’s a flavor explosion that takes a classic salad and transforms it into an incredibly satisfying meal. We all know and adore the iconic Caesar salad with its creamy dressing, crunchy romaine, and salty Parmesan. But imagin extracte all that goodness, elevated, nestled between two soft buns with perfectly fried, juicy chicken? That’s the magic of the Crispy Chicken Caesar Sandwich. What makes it so special? It’s the textural contrast: the shattering crisp of the chicken against the tender lettuce and the soft bread, all brought together by that irresistible, tangy Caesar dressing. It’s comfort food with a sophisticated twist, perfect for a quick lunch, a casual dinner, or even a crowd-pleasing appetizer. Get ready to ditch your fork and knife, because this sandwich is about to become your new obsession.
The Ultimate Crispy Chicken Caesar Sandwich Recipe
Prepare yourself for sandwich nirvana! This Crispy Chicken Caesar Sandwich takes a classic flavor profile and elevates it to a whole new level of deliciousness. We’re talking about perfectly seasoned, impossibly crispy chicken, tossed in a creamy, tangy Caesar dressing, and nestled between soft buns. It’s the kind of sandwich that will have you savoring every single bite. Forget those sad, soggy versions; this recipe is all about achieving that satisfying crunch and bold flavor you crave. Whether it’s for a quick lunch, a hearty dinner, or even a weekend treat, this sandwich is guaranteed to become a favorite.
Ingredients:
Preparing the Star: The Crispy Chicken
The foundation of any great sandwich is, of course, the protein. For this recipe, we’re focusing on achieving that perfect crispy coating on our chicken cutlets. This not only adds incredible texture but also locks in the juices, ensuring a tender and flavorful bite. We’ll start by prepping our chicken cutlets. If your cutlets are a bit thick, you can gently pound them to an even thickness, about ½ inch. This ensures they cook through evenly and quickly, preventing any raw insides and burnt exteriors. Season both sides generously with sea salt and ground black pepper – don’t be shy here, as this is your first layer of flavor.
Next, we’ll set up our dredgin extractg station. In one shallow dish, place the ⅓ cup of all-purpose flour and ½ tsp of salt. Mix it well. This simple flour coating will help create a light, crispy crust when fried.
The Caesar Dressing Magic
While our chicken rests, let’s whip up the irresistible Caesar dressing that will tie everything together. In a medium bowl, combine the full-fat mayonnaise, Greek yogurt (for a touch of tang and creaminess), Dijon mustard, Worcestershire sauce, and fresh lemon juice. The lemon juice is crucial for cutting through the richness and adding that signature Caesar brightness. Now, the garlic! Mince your garlic cloves as finely as possible or even consider using a microplane for an ultra-smooth paste. Add the minced garlic to the bowl, along with the freshly grated Parmesan cheese. The Parmesan is non-negotiable for authentic Caesar flavor. Finally, season with ¼ tsp black pepper and a pinch of sea salt. Whisk everything together until it’s completely smooth and emulsified. Taste and adjust seasonings if necessary. You want a dressing that is tangy, savory, and perfectly balanced. If it’s a little too thick, you can add a tiny splash more lemon juice or even a teaspoon of water.
Frying the Chicken to Perfection
Now comes the exciting part: frying the chicken! Heat a generous amount of oil in a large skillet or Dutch oven over medium-high heat. You want enough oil to come about ½ inch up the sides of the pan. The oil is ready when a small drop of flour sizzles immediately upon contact. Carefully place the seasoned chicken cutlets into the seasoned flour, ensuring they are fully coated on both sides. Shake off any excess flour.
Gently lay the floured chicken cutlets into the hot oil, being careful not to overcrowd the pan. Fry for about 3-4 minutes per side, or until golden brown and cooked through. The exact time will depend on the thickness of your chicken. You’re looking for an internal temperature of 165°F (74°C). Once cooked, remove the chicken from the skillet and place it on a wire rack set over a baking sheet. This allows excess oil to drain and keeps the chicken crispy, preventing it from getting soggy on a paper towel.
Assembling Your Masterpiece
Once your chicken is perfectly fried and slightly cooled, it’s time to assemble these magnificent sandwiches. You can toast your favorite sandwich buns if you like, but it’s optional. Lay out your bottom buns. Generously slather them with a good amount of your homemade Caesar dressing. Place a crispy chicken cutlet on top of the dressing.
Now, for the classic Caesar toppings. While not explicitly listed in the core ingredients, for the ultimate Caesar experience, you’d typically add crisp romaine lettuce leaves and perhaps some extra shaved Parmesan cheese. If you have them on hand, a few leaves of fresh romaine lettuce would be a fantastic addition. Drizzle a little more of that glorious Caesar dressing over the chicken and lettuce. Add the top bun, and voilà! You have yourself a Crispy Chicken Caesar Sandwich that is truly a work of art.
Note 1: Chicken cutlets are typically thin, boneless, skinless chicken breasts that have been butterflied or sliced horizontally. If you can’t find pre-cut cutlets, you can simply slice a larger chicken breast in half horizontally to create two thinner pieces.
Conclusion:
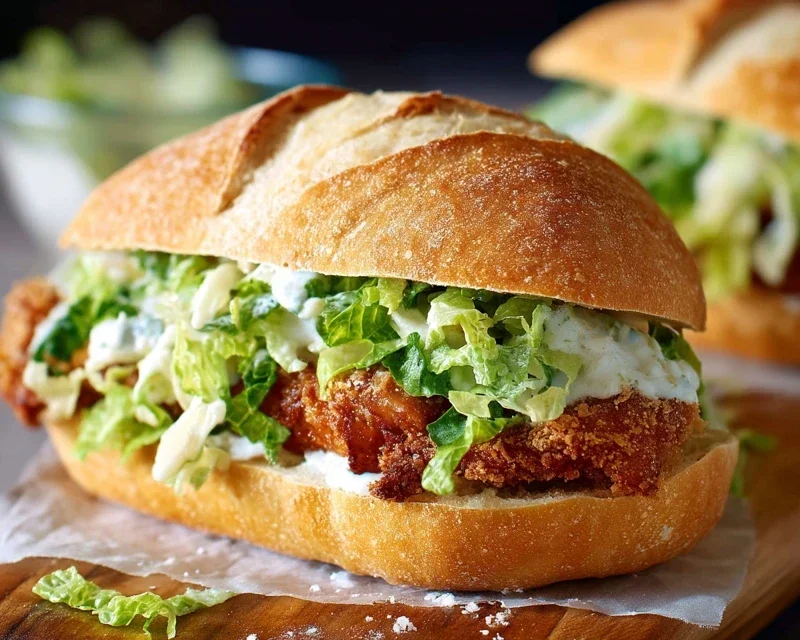
So there you have it! Your guide to crafting the ultimate Crispy Chicken Caesar Sandwich. This recipe is truly a winner because it delivers that satisfying crunch from perfectly fried chicken, balanced by the creamy, tangy Caesar dressing and the fresh bite of romaine lettuce, all nestled within a soft bun. It’s a symphony of textures and flavors that elevates a simple sandwich into a truly memorable meal.
I love serving these sandwiches alongside a vibrant coleslaw, a classic potato salad, or even just a simple side of sweet potato fries. For a lighter option, a mixed green salad with a vinaigrette is a fantastic choice. Don’t be afraid to experiment with variations! You can use grilled chicken for a healthier twist, add some crispy beef bacon for extra indulgence, or even switch up the cheese to something sharper like aged cheddar. The possibilities are endless!
I truly encourage you to give this Crispy Chicken Caesar Sandwich recipe a try. It’s surprisingly simple to make and the results are absolutely delicious. It’s perfect for a quick weeknight dinner, a hearty lunch, or even a casual get-together with friends. Prepare to impress yourself and everyone you share it with!
Frequently Asked Questions:
Can I make the chicken ahead of time?
Absolutely! You can bread and fry the chicken a day in advance. Let it cool completely, then store it in an airtight container in the refrigerator. Reheat it in a hot oven or an air fryer for a few minutes before assembling your sandwich to regain that delightful crispiness.
What kind of chicken is best for this sandwich?
Boneless, skinless chicken breasts or thighs work wonderfully. Breasts tend to be leaner, while thighs offer a bit more moisture and flavor. Just make sure to pound the breasts to an even thickness for consistent cooking and a better sandwich experience.
Is there a way to make this vegetarian?
Yes! You can substitute the chicken with crispy fried halloumi cheese or even a thick slice of fried tofu that has been marinated in a savory blend. Both offer a fantastic textural contrast and absorb flavors beautifully.
Crispy Chicken Caesar Sandwich
A delicious and satisfying sandwich featuring crispy fried chicken cutlets on a toasted bun with a creamy homemade Caesar dressing.
Ingredients
-
5 chicken cutlets
-
½ cup full-fat mayonnaise
-
3 tbsp Greek yogurt
-
1 tsp Dijon mustard
-
1 tsp Worcestershire sauce
-
2 tbsp lemon juice
-
¼ cup Parmesan cheese (freshly grated)
-
1-2 garlic cloves (minced)
-
¼ tsp black pepper
-
Pinch sea salt
-
sea salt (to taste)
-
ground black pepper (to taste)
-
Oil (for frying)
-
⅓ cup all-purpose flour
-
½ tsp salt
Instructions
-
Step 1
Prepare the Caesar dressing: In a medium bowl, whisk together mayonnaise, Greek yogurt, Dijon mustard, Worcestershire sauce, lemon juice, Parmesan cheese, minced garlic, ¼ tsp black pepper, and pinch sea salt until well combined. Taste and adjust seasoning if needed. -
Step 2
Prepare the chicken: Season chicken cutlets generously with sea salt and ground black pepper on both sides. -
Step 3
Set up a dredging station: In one shallow dish, combine all-purpose flour and ½ tsp salt. In another shallow dish, place the seasoned chicken cutlets. -
Step 4
Bread the chicken: Dredge each chicken cutlet in the flour mixture, ensuring it is fully coated. Shake off any excess flour. -
Step 5
Fry the chicken: Heat enough oil in a large skillet over medium-high heat for shallow frying. Carefully add the floured chicken cutlets to the hot oil and fry for 4-5 minutes per side, or until golden brown and cooked through. Remove from oil and drain on a paper towel-lined plate. -
Step 6
Assemble the sandwiches: Toast your favorite sandwich buns. Spread a generous amount of Caesar dressing on the bottom half of each bun. Place a crispy chicken cutlet on top of the dressing, then add more dressing to the top bun before closing the sandwich.
Important Information
Nutrition Facts (Per Serving)
It is important to consider this information as approximate and not to use it as definitive health advice.
Allergy Information
Please check ingredients for potential allergens and consult a health professional if in doubt.