Easy Pickled Red Onions- Quick Recipe
Pickled red onions are an absolute game-changer in my kitchen, and I’m so excited to share how easy they are to make! If you’ve ever wondered what gives those incredible tacos, vibrant salads, or perfectly balanced sandwiches that extra pop of flavor and gorgeous color, chances are, it’s these magic little gems. They’re not just about adding a tangy bite; pickled red onions offer a delightful crunch and a sweet-sour complexity that elevates even the simplest of meals. What truly makes them special is their versatility. They transform ordinary dishes into something truly extraordinary with minimal effort. Forget store-bought – creating your own batch of pickled red onions is incredibly rewarding and allows you to control the brine’s sweetness and tang. Get ready to fall in love with their bright pink hue and unforgettable taste!
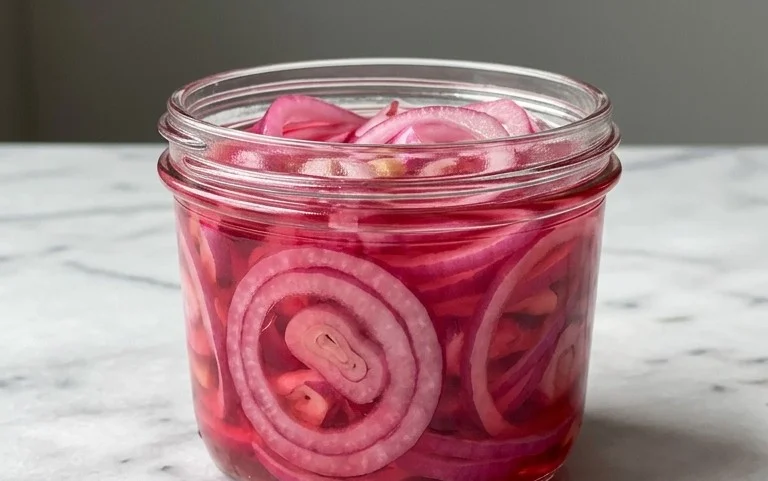
Ingredients:
Pickled Red Onions: Your Instant Flavor Boost
There are some kitchen staples that, once you discover them, you wonder how you ever lived without them. For me, pickled red onions are absolutely one of those things. They’re not just a garnish; they’re a transformative ingredient that can elevate everything from a simple taco to a fancy salad, a humble burger to a hearty grain bowl. The vibrant pink hue is a visual delight, but it’s the tangy, slightly sweet, and wonderfully crisp texture that truly makes them a game-changer. The best part? They are incredibly easy to make. You don’t need any fancy equipment or culinary expertise. In fact, the process is so straightforward, you can whip up a batch in just a few minutes, and they’ll be ready to use in no time at all. This recipe focuses on simplicity and uses readily available ingredients, ensuring you can have these delightful pickled onions gracing your meals whenever the craving strikes.
One of the things I love most about this recipe is its versatility. While I’ve provided a specific ratio of ingredients, feel free to adjust them to your personal taste. If you prefer a tarter pickle, you can increase the vinegar slightly. If you have a sweet tooth, a touch more sugar can be added. For those watching their sugar intake, using a sugar substitute or omitting it altogether works beautifully, though you might find the flavor profile leans a bit more towards the sharp vinegar. The kosher salt is crucial for both flavor and the pickling process, so I recommend sticking with that measurement unless you’re very familiar with adjusting salt levels in brines.
The raw red onion provides a satisfying crunch and a pungent bite that is softened and mellowed by the pickling liquid. The vinegar adds its characteristic acidity, which not only preserves the onions but also creates that signature tangy flavor. The water helps to dilute the vinegar, making the brine less harsh and more palatable. Sugar, as mentioned, balances the acidity, providing a subtle sweetness that rounds out the overall taste. And the salt? It enhances all these flavors and draws out some of the excess moisture from the onions, contributing to their crisp texture.
Preparing Your Onions
The first step to achieving perfectly pickled red onions is selecting the right onion. A large red onion is ideal because it offers a good amount of onion to pickle and a beautiful color. You want an onion that feels firm and heavy for its size, with no soft spots or blemishes. Once you have your onion, you’ll need to prepare it for the brine. This involves peeling off the papery outer layers. Sometimes, the very first layer or two can be a bit dry or tough, so don’t hesitate to remove them to get to the fresh, vibrant onion beneath. After peeling, the onion needs to be thinly sliced. This is key for two reasons: thin slices allow the brine to penetrate the onion quickly and evenly, ensuring they pickle uniformly. They also make for a pleasant eating experience; you don’t want large, clunky pieces of onion. I often use a mandoline slicer for this if I’m feeling fancy and want perfectly uniform slices, but a sharp knife and a steady hand work just as well. Aim for slices that are about 1/8 inch thick. If your slices are too thick, they might remain too crunchy or not pickle as effectively. Too thin, and they can become mushy.
Crafting the Pickling Brine
Now that your onion is prepped, it’s time to make the magical brine that will transform it. This is where the core of the pickling process happens. In a small saucepan, combine the white vinegar, water, sugar, and kosher salt. It’s important to use a non-reactive saucepan, such as stainless steel or glass, as acidic liquids can sometimes react with reactive metals like aluminum. Place the saucepan over medium heat. You don’t need to boil the mixture vigorously; the goal here is simply to dissolve the sugar and salt completely into the liquid. Stir the mixture occasionally as it heats up. You’ll know the sugar and salt have dissolved when you can no longer see them at the bottom of the pan. Once they are fully incorporated, remove the saucepan from the heat. It’s important to let the brine cool slightly before pouring it over the onions, as pouring boiling hot liquid directly onto raw onions can sometimes cook them slightly and alter their texture in an undesirable way. We want a crisp pickle, not a cooked one.
The Infusion Process
Once your brine has cooled for a few minutes (it should still be warm but not scalding), it’s time to combine it with the sliced red onions. You can do this directly in the jar you plan to store them in, or in a separate heatproof bowl if you prefer. If you’re using a jar, a mason jar works perfectly. Make sure the jar is clean. Place your thinly sliced red onions into the jar or bowl. Now, carefully pour the warm pickling brine over the onions. Ensure that the onions are completely submerged in the liquid. If some onion slices are sticking out, gently press them down with a spoon. This ensures even pickling and prevents any parts of the onion from being exposed to air, which can lead to spoilage. You’ll notice that as the warm brine hits the red onions, their color will immediately start to bleed into the liquid, transforming into that beautiful, vibrant pink we’re after. It’s quite satisfying to watch!
Patience and Preservation
After the onions are submerged in the brine, you’ll need to let them sit and work their magic. The initial pickling process happens quite quickly. You can start to see the color change within minutes. For the best flavor and texture, I recommend letting them sit at room temperature for at least 30 minutes. During this time, the onions will soften slightly and absorb the tangy, salty, and sweet flavors of the brine. They will also develop a more pleasant, less sharp onion flavor. However, for a more developed pickle, you can leave them for up to an hour or even longer. Once they’ve reached your desired level of pickling, it’s time to store them properly. Seal the jar tightly and transfer it to the refrigerator. The cold temperature will slow down the pickling process and preserve the onions. They will continue to soften and their flavor will deepen as they sit in the refrigerator. I find that they are usually best after at least an hour in the fridge, but they truly shine after a few hours or even overnight.
Enjoying Your Quick Pickled Onions
The best part about making your own pickled red onions is the instant gratification. They are incredibly versatile and can be used in so many ways. Drain them slightly before adding them to your dishes to avoid making things too soggy. They are absolutely fantastic piled onto burgers, sandwiches, and hot dogs. Add them to tacos, burritos, or quesadillas for a burst of acidity and crunch. They are also a brilliant addition to salads, grain bowls, and even avocado toast. For a more sophisticated touch, serve them alongside grilled meats, fish, or roasted vegetables. They cut through richness beautifully and add a welcome pop of flavor and color. These pickled red onions will keep in the refrigerator for at least two weeks, and often longer, making them a convenient and delicious condiment to have on hand. So go ahead, give this recipe a try, and prepare to fall in love with the humble pickled red onion!
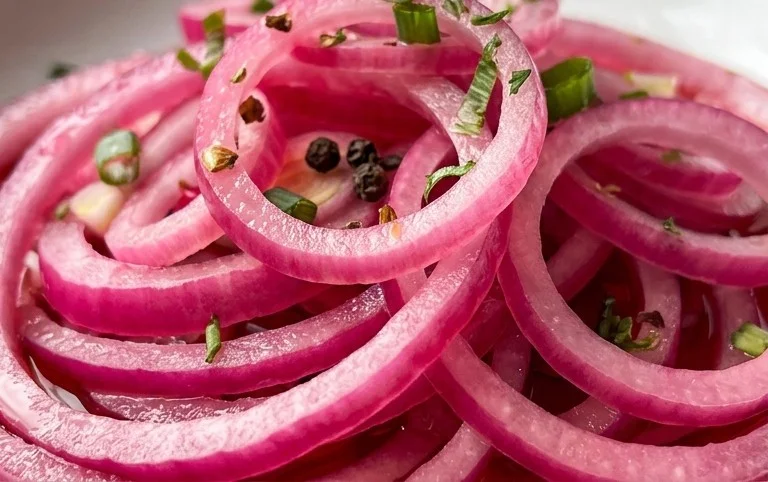
Conclusion:
And there you have it! Crafting your own batch of vibrant, tangy pickled red onions is an incredibly rewarding and surprisingly simple process. This recipe truly shines because it elevates humble ingredients into something extraordinary, adding a bright, acidic punch and beautiful color to practically any dish. Forget store-bought options; homemade pickled red onions are fresher, tastier, and customizable to your exact preferences. Their versatility is truly astounding. Think of them as your secret weapon for making meals pop!
From tacos and sandwiches to salads and grain bowls, these pickled beauties are a game-changer. I love them piled high on avocado toast, mixed into a potato salad, or even as a zesty topping for grilled fish. Don’t be afraid to experiment! You can adjust the sweetness by adding a touch more sugar or honey, or amp up the spice with a pinch of red pepper flakes or a few slices of jalapeño. Perhaps even infuse them with a sprig of fresh dill or a bay leaf for an extra layer of flavor. I wholeheartedly encourage you to give this pickled red onions recipe a try. You’ll be amazed at how often you reach for them!
Frequently Asked Questions:
Q: How long do pickled red onions last?
A: Properly stored in an airtight container in the refrigerator, your delicious pickled red onions should remain fresh and flavorful for at least 2-3 weeks, and often longer. The vinegar acts as a fantastic preservative.
Q: Can I use a different type of vinegar?
A: Absolutely! While apple cider vinegar is my go-to for its balanced flavor, white grape juice vinegar or even red grape juice vinegar will work beautifully and offer slightly different flavor profiles. Experiment to find your favorite!
Pickled Red Onions
Quick and easy pickled red onions that add a tangy, vibrant crunch to any dish. Perfect for tacos, salads, sandwiches, and more.
Ingredients
-
1 large Red onion, thinly sliced
-
1 cup White Vinegar
-
1 cup Water
-
1 tablespoon Sugar
-
2 teaspoons Kosher salt
Instructions
-
Step 1
Thinly slice the red onion. -
Step 2
In a medium saucepan, combine white vinegar, water, sugar, and kosher salt. -
Step 3
Heat the mixture over medium heat, stirring until the sugar and salt are dissolved. Do not boil. -
Step 4
Place the sliced red onions into a heatproof jar or bowl. -
Step 5
Pour the hot brine over the onions, ensuring they are fully submerged. -
Step 6
Let the onions cool to room temperature, then cover and refrigerate for at least 30 minutes before serving. They will turn a vibrant pink color.
Important Information
Nutrition Facts (Per Serving)
It is important to consider this information as approximate and not to use it as definitive health advice.
Allergy Information
Please check ingredients for potential allergens and consult a health professional if in doubt.