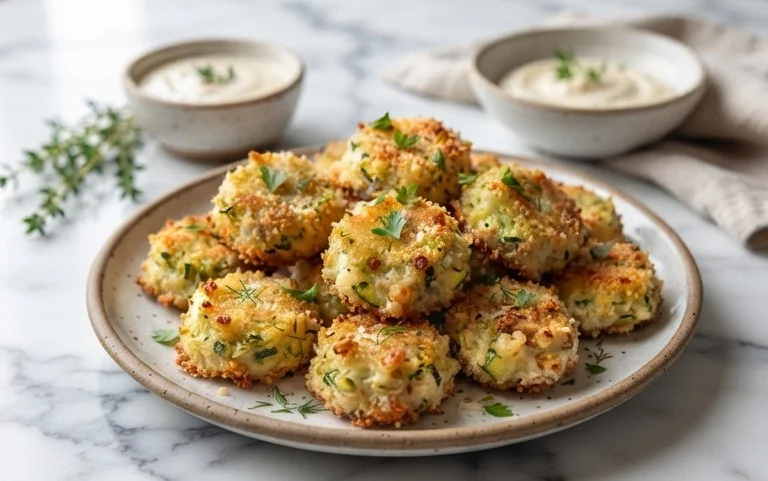
Easy Fried Pickle Dip – Dairy Free Option
Easy Fried Pickle Dip, oh, how I love you! If you’re anything like me, the tangy, briny crunch of a fried pickle is pure bliss. But what if you could capture that irresistible flavor and texture in a creamy, dippable form? Enter this delightful Easy Fried Pickle Dip. It’s the ultimate appetizer, perfect for game nights, casual get-togethers, or just when you need a serious flavor boost. What makes this dip so special? It’s the genius way we recreate that signature fried pickle taste without the fuss of individual frying. Plus, with a simple dairy-free option, everyone can join in on the deliciousness. Get ready to impress your taste buds and your guests with a dip that’s as easy to make as it is to devour.
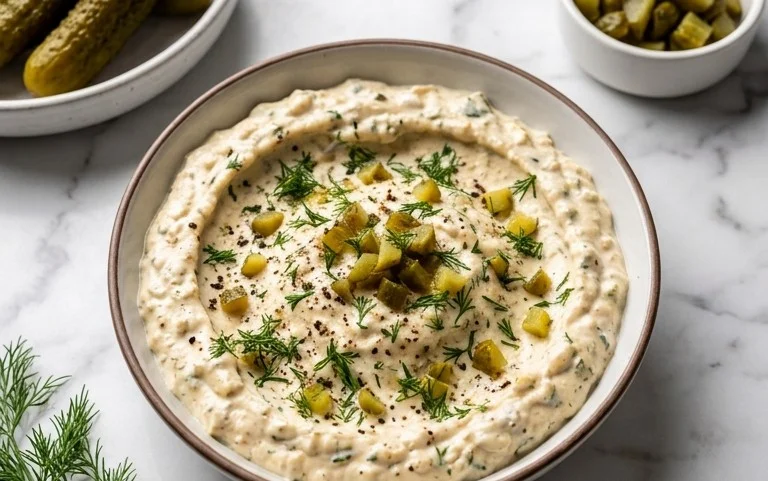
Easy Fried Pickle Dip (Dairy-Free Option)
Oh, the joy of a good dip! Especially one that captures the tangy, briny goodness of fried pickles in a dippable, spreadable form. This Easy Fried Pickle Dip is a crowd-pleaser, perfect for game days, potlucks, or just a cozy night in with some chips. And the best part? It’s incredibly adaptable, with a simple dairy-free option that doesn’t compromise on flavor or texture. Get ready to impress yourself and everyone around you with this surprisingly simple yet utterly delicious appetizer.
Ingredients:
Cooking Instructions:
Let’s get started on creating this flavor explosion. The beauty of this dip lies in its simplicity. Most of the magic happens with just a few minutes of prep and a little heat to bring everything together.
Step 1: Prepare the Creamy Base
The foundation of our fried pickle dip is a rich and creamy blend of sour cream and cream cheese. If you’re using regular dairy products, make sure your cream cheese is softened to room temperature. This is crucial for achieving a smooth, lump-free dip. You can leave it out on the counter for about an hour before you plan to start, or if you’re in a hurry, you can gently microwave it in 10-second intervals, stirring in between, until it’s soft but not melted. For the dairy-free version, I highly recommend Kite Hill cream cheese alternative – it has a fantastic texture and a neutral flavor that works beautifully here. In a medium-sized bowl, combine your softened cream cheese (or dairy-free alternative) with the sour cream (or your favorite dairy-free sour cream substitute). Using an electric mixer, beat these together until they are incredibly smooth and well combined. You want a consistent texture with no visible streaks of cream cheese. This initial creaming step is key to a luxurious mouthfeel for your dip.
Step 2: Infuse with Pickle Power
Now it’s time to add the star of the show – the pickles! Finely chop your dill pickles. The smaller the chop, the more evenly the pickle flavor will distribute throughout the dip. Don’t discard the juice! We’ll be using some of that brine to amp up the flavor. Add the chopped pickles and the pickle juice to the cream cheese and sour cream mixture. Stir in the Worcestershire sauce. If you’re unfamiliar with Worcestershire sauce, it’s a fermented condiment that adds a deep, umami flavor. It’s a small amount, but it makes a big difference in rounding out the taste profile. Give everything a good mix until it’s all incorporated. At this stage, you can also add your chopped fresh dill, garlic powder, and onion powder. The fresh dill provides a bright, herbaceous note that is essential for that pickle-y freshness. The garlic and onion powders offer a subtle savory undertone that complements the tang of the pickles.
Step 3: Season and Perfect
This is where we really dial in the flavor. Stir in the ranch seasoning. I often make my own ranch seasoning blend, which gives me control over the ingredients and allows me to easily make it dairy-free. If you’re using a store-bought ranch seasoning packet, you can use that, but be mindful of any dairy ingredients if you need a strictly dairy-free option. Taste the dip at this point. You might be surprised at how delicious it already is! Now, we’ll season with salt. Start with a small pinch and taste again. Pickles and pickle juice are already salty, so it’s easy to over-salt. You want to enhance the flavors, not overpower them. Stir everything thoroughly until the seasonings are evenly distributed. If the dip seems a little too thick for your liking, you can add another teaspoon or two of pickle juice to loosen it up.
Step 4: Toast the Panko for the “Fried” Element
While the dip itself isn’t fried, we’re creating a toasty, crunchy topping that mimics the satisfying texture of fried pickles. In a small skillet over medium heat, melt the butter (or dairy-free butter). Once melted, add the Panko breadcrum extractbs. Stir the Panko constantly as it toasts. You want to achieve a beautiful golden-brown color. This process typically takes about 3-5 minutes. Keep a close eye on them, as Panko can burn very quickly. The toasting process brings out a nutty flavor and a satisfying crunch that is essential for this dip. It’s this step that truly elevates it from just a creamy dip to a “fried pickle” experience. Once they’re golden brown, immediately remove them from the skillet to prevent further cooking.
Step 5: Assemble and Serve
Now for the grand finnon-alcoholic ale! Transfer your creamy, pickle-infused dip into a serving bowl. Spread it out evenly. Sprinkle the toasted Panko breadcrum extractbs generously over the top of the dip. This creates that irresistible crunchy texture that we all love. For an extra touch of visual appeal and a burst of fresh flavor, you can garnish with a little extra chopped fresh dill. This dip is best served slightly chilled or at room temperature, allowing the flavors to meld together. It’s absolutely divine with a variety of dippers: tortilla chips, potato chips, crackers, or even fresh vegetable sticks like celery and carrots. For a more indulgent pairing, consider serving it with some of those iconic fried pickle spears! Enjoy every tangy, creamy, crunchy bite!
Conclusion:
And there you have it – the simplest, most satisfying Easy Fried Pickle Dip you’ll ever make! This recipe truly shines with its incredible flavor profile, bringin extractg together that tangy pickle goodness with a creamy, zesty base. Whether you’re craving a classic version or opting for the fantastic dairy-free alternative, this dip is a guaranteed crowd-pleaser. It’s perfect for game nights, potlucks, or just a cozy night in. The beauty of this dip lies in its versatility; it’s amazing served warm or chilled. We love pairing it with a variety of dippers, from crispy tortilla chips and fresh vegetable sticks to even toasted bread slices. Don’t be afraid to get creative with variations – maybe add a pinch of smoked paprika for a subtle smoky note, or a dash of hot sauce for an extra kick!
I truly encourage you to give this Easy Fried Pickle Dip a try. It’s so approachable, even for begin extractner cooks, and the results are incredibly rewarding. Get ready to impress yourself and your loved ones with this delightful appetizer!
Frequently Asked Questions:
Q: Can I make this dip ahead of time?
A: Absolutely! This dip can be made a day in advance. Store it in an airtight container in the refrigerator. For the best flavor and texture, let it sit at room temperature for about 15-20 minutes before serving if serving chilled, or gently reheat if you prefer it warm.
Q: What are some other good dippers for this fried pickle dip?
A: Beyond the usual suspects like chips and veggies, consider toasted baguette slices, pita bread, pretzels, or even crispy chicken tenders. The savory and tangy nature of the dip complements a wide range of textures and flavors.
Q: How can I make the dairy-free version extra creamy?
A: For the dairy-free option, using a good quality, unsweetened, plain vegan cream cheese alternative is key. Blending in a tablespoon or two of unsweetened plain plant-based yogurt (like soy or coconut) can also add extra creaminess and a pleasant tang, mimicking the richness of traditional dairy.
Easy Fried Pickle Dip (Dairy-Free Option)
A creamy and zesty dip featuring the tangy flavor of fried pickles, with an easy dairy-free substitution option.
Ingredients
-
16 oz container sour cream (can sub dairy free)
-
10 oz cream cheese (can sub dairy free)
-
1 cup dill pickles (chopped)
-
2 tbsp pickle juice
-
1 tbsp Worcestershire sauce
-
2-3 tbsp fresh dill
-
1/2 tsp garlic powder
-
1/4 tsp onion powder
-
2 tbsp ranch seasoning (my homemade seasoning has a df option)
-
salt to taste
-
3/4 cup Panko breadcrumbs
-
1 tbsp butter (or dairy-free butter)
Instructions
-
Step 1
In a medium bowl, combine sour cream, cream cheese, chopped dill pickles, pickle juice, Worcestershire sauce, fresh dill, garlic powder, onion powder, and ranch seasoning. Mix until well combined. -
Step 2
Taste and add salt as needed. If using a dairy-free substitute for cream cheese, ensure it’s softened before mixing for a smoother consistency. -
Step 3
Transfer the dip to an oven-safe serving dish or individual ramekins. -
Step 4
In a small skillet, melt butter over medium heat. Add Panko breadcrumbs and toast until golden brown and crispy, stirring frequently. -
Step 5
Sprinkle the toasted Panko breadcrumbs evenly over the top of the dip. -
Step 6
Bake in a preheated oven at 375°F (190°C) for 8-10 minutes, or until the dip is heated through and the breadcrumbs are golden. -
Step 7
Serve warm with your favorite dippers like tortilla chips, crackers, or fresh vegetables.
Important Information
Nutrition Facts (Per Serving)
It is important to consider this information as approximate and not to use it as definitive health advice.
Allergy Information
Please check ingredients for potential allergens and consult a health professional if in doubt.