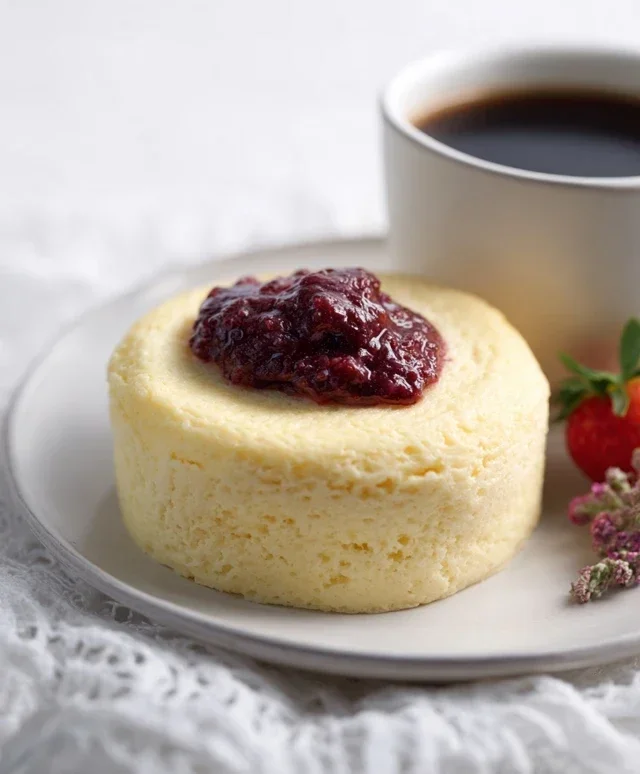
Easy Keto Cheesecake In A Mug Recipe
Craving a decadent dessert but sticking to your low-carb lifestyle? You’re in luck! Keto cheesecake in a mug is about to become your new best friend. We all know the allure of a creamy, rich cheesecake, but the traditional version is loaded with sugar and carbs. That’s where this magical, single-serving wonder comes in. It’s the perfect solution for those moments when a sweet tooth strikes and you want something truly satisfying without derailing your keto journey. What makes this keto cheesecake in a mug so special? It’s unbelievably easy, requires no oven time, and delivers all the delightful flavor and texture you expect from a classic cheesecake. Get ready to indulge guilt-free!
Keto Cheesecake In a Mug
Craving a decadent dessert but sticking to your ketogenic lifestyle? Look no further! This Keto Cheesecake in a Mug is your answer to that sweet tooth craving, delivering all the creamy, dreamy goodness of traditional cheesecake without the carb load. It’s incredibly easy to make, requires minimal ingredients, and the best part? It’s ready in mere minutes! Perfect for a single-serving indulgence, this recipe is a game-changer for anyone on a low-carb journey. Forget those store-bought sugar bombs; you can whip up a guilt-free treat right in your own kitchen.
This recipe is designed for speed and simplicity. You don’t need a special springform pan, a water bath, or hours of chilling time. Just grab a microwave-safe mug, a few key ingredients, and a few minutes of your time, and you’ll be enjoying a warm, luscious cheesecake that tastes like pure bliss. I love making this for an afternoon pick-me-up or even as a surprisingly satisfying dessert after a savory keto meal. The texture is surprisingly similar to a baked cheesecake, with that characteristic slightly firm exterior and wonderfully gooey center.
Let’s dive into what you’ll need to create this magical mug dessert.
Ingredients:
Now that you have your ingredients gathered, let’s get to the fun part – making your delicious Keto Cheesecake in a Mug!
Microwave Magic: The Baking Process
This recipe takes advantage of the microwave for incredibly fast cooking. The key is to cook it in short intervals to prevent overcooking, which can lead to a rubbery texture. We want that perfect, melt-in-your-mouth creaminess.
1. Prepare Your Mug: First things first, grab your favorite microwave-safe mug. A standard-sized mug is perfect for this recipe. Make sure it’s clean and dry. You don’t need to grease the mug, as the cream cheese and egg mixture will create a non-stick surface as it cooks.
2. Cream Together the Base: In your mug, add the softened cream cheese and the sour cream. You’ll want the cream cheese to be softened so it blends smoothly. If yours is a bit firm, you can microwave it for about 10-15 seconds to soften it up. Then, add the powdered monkfruit sweetener. Using a small whisk or a fork, beat these ingredients together until they are thoroughly combined and you have a smooth, creamy mixture with no lumps. This step is crucial for a smooth cheesecake texture, so take your time to ensure everything is well incorporated. The sweetener will help to dissolve into the fats, making the cheesecake sweet and delicious.
3. Incorporate the Egg and Vanilla: Now, crack your room-temperature egg directly into the mug with the cream cheese mixture. Add the vanilla extract. Using your whisk or fork again, beat everything together until it’s just combined. Be careful not to over-mix at this stage. Over-mixing can incorporate too much air, which might cause the cheesecake to puff up excessively and then collapse. We’re aiming for a smooth, uniform batter. The room temperature egg also helps it to emulsify better with the cream cheese, leading to a smoother final product.
4. Microwave in Stages: This is where the magic happens! Place your mug in the microwave. Cook on high power for approximately 60 seconds. The cheesecake will likely puff up around the edges and may still look a little wet in the center – this is perfectly normal! Carefully remove the mug from the microwave (it will be hot!). Let it sit for about 30 seconds to a minute.
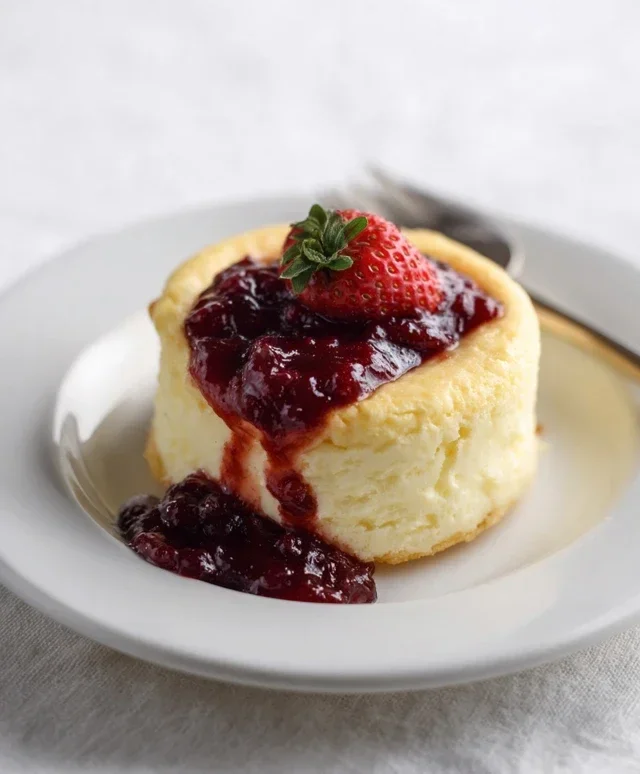
5. Final Cook and Cooling: Return the mug to the microwave for another 30 seconds. Check its consistency. The edges should be set, and the center should appear mostly set but still slightly soft and jiggly. If it still seems very liquidy in the center, microwave for an additional 15-second intervals, checking after each interval, until it’s just set. The key is to avoid overcooking. The residual heat will continue to cook the center as it cools. Once it looks done, let it cool in the mug for at least 5-10 minutes. This cooling period is essential for the cheesecake to firm up properly. You can then enjoy it warm or chilled, directly from the mug. For an extra special treat, consider topping it with some fresh berries or a dollop of whipped cream. This quick and easy keto cheesecake in a mug is your instant gratification dessert!
Conclusion:
And there you have it – the easiest, most satisfying Keto Cheesecake In a Mug you’ll ever make! I truly believe this recipe is a game-changer for anyone craving a decadent dessert without derailing their low-carb lifestyle. It’s incredibly quick to whip up, perfect for those moments when a sweet craving strikes, and incredibly forgiving. The creamy, rich texture and tangy sweetness are just divine, and the fact that it cooks up in minutes in the microwave makes it an absolute lifesaver.
For serving, I love to enjoy my Keto Cheesecake In a Mug with a small dollop of sugar-free whipped cream and a sprinkle of fresh berries, like raspberries or blueberries. A few dark chocolate shavings can also elevate it beautifully. Don’t be afraid to experiment with variations! You can easily add a dash of cinnamon or a hint of lemon zest to the batter for a different flavor profile. Some people even like to swirl in a tablespoon of sugar-free peanut butter or almond butter before microwaving for a nutty twist.
I wholeheartedly encourage you to give this recipe a try. It’s so simple, so delicious, and proves that you don’t have to miss out on amazing desserts when following a ketogenic diet. Let me know in the comments what variations you come up with!
Frequently Asked Questions:
Can I make this ahead of time?
While this Keto Cheesecake In a Mug is best enjoyed fresh from the microwave for optimal texture, you can prepare the batter and refrigerate it for a few hours. However, the texture might become slightly denser upon reheating. For the best result, I recommend mixing and cooking it right when you want to indulge.
What if I don’t have a microwave?
If you don’t have a microwave, you can adapt this recipe for a small oven-safe ramekin. You’ll want to bake it in a preheated oven at around 350°F (175°C) for about 15-20 minutes, or until the edges are set and the center is still slightly jiggly. Keep a close eye on it as oven times can vary.
Can I use a different sweetener?
Absolutely! Feel free to substitute your favorite keto-friendly sweetener, such as erythritol, xylitol (just be cautious if you have pets, as it’s toxic to dogs), or a monk fruit blend. Adjust the amount to your personal preference, as sweetness levels can vary between different sweeteners.
Keto Cheesecake In a Mug
A quick and easy keto-friendly cheesecake for one, made in the microwave in just minutes.
Ingredients
-
3 1/2 tbsp cream cheese (softened, 52g)
-
1/2 tbsp sour cream (7g)
-
2 tbsp powdered monkfruit sweetener (20g)
-
1 large egg (room temperature)
-
1/4 tsp vanilla extract
Instructions
-
Step 1
In a microwave-safe mug, combine the softened cream cheese and sour cream. Stir until smooth. -
Step 2
Add the powdered monkfruit sweetener and vanilla extract to the mug. Mix well. -
Step 3
Whisk in the egg until the mixture is completely combined and smooth. -
Step 4
Microwave on high for 60-90 seconds, or until the edges are set but the center is still slightly jiggly. -
Step 5
Let the cheesecake cool in the mug for a few minutes before enjoying. For a firmer texture, refrigerate for at least 30 minutes.
Important Information
Nutrition Facts (Per Serving)
It is important to consider this information as approximate and not to use it as definitive health advice.
Allergy Information
Please check ingredients for potential allergens and consult a health professional if in doubt.