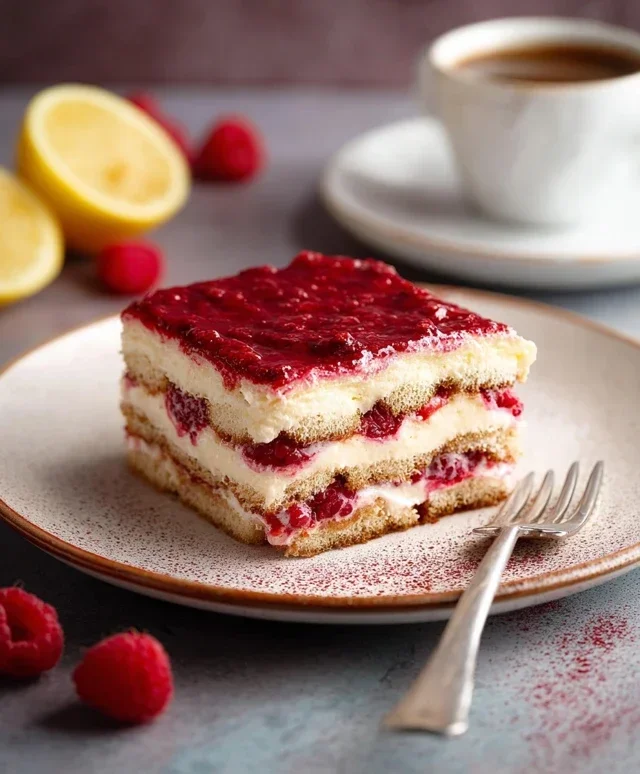
Lucky St Patricks Day Desserts You Will Love
St. Patrick’s Day Desserts are more than just a sweet treat; they’re a vibrant celebration of all things green, gold, and festive! As March 17th approaches, there’s a palpable excitement for those delightful concoctions that capture the spirit of the Emerald Isle. We all love them because they offer a playful and delicious way to get into the holiday mood. Whether it’s the rich decadence of a chocolate mint cake or the cheerful hue of lime-infused cookies, these St. Patrick’s Day Desserts bring a smile to everyone’s face. What truly makes them special is their ability to transform simple ingredients into edible art, infused with the magic and merriment of this beloved holiday. Get ready to indulge in some truly enchanting flavors!

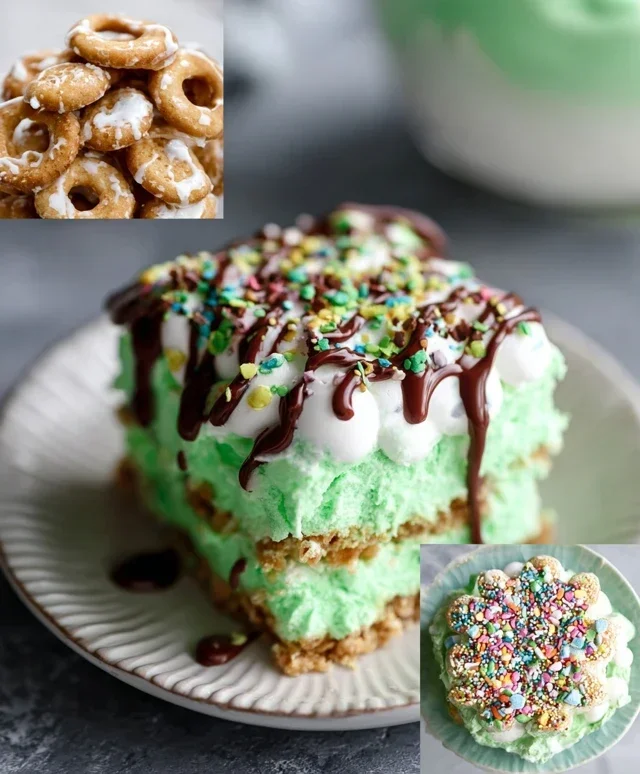
St. Patrick’s Day Desserts
St. Patrick’s Day is a time for celebration, and what better way to get into the festive spirit than with some delicious, green-hued desserts? Whether you’re hosting a party or just want to add a touch of Irish cheer to your evening, these treats are sure to be a hit. I’ve gathered a collection of my favorite St. Patrick’s Day dessert ideas, focusing on simple yet delightful recipes that capture the essence of the holiday. We’ll be making a vibrant green dessert that’s surprisingly easy to whip up!
This recipe is all about bringin extractg a splash of St. Patrick’s Day color and flavor to your table. It’s perfect for sharing with family and friends, and the vibrant green is undeniably festive.
Ingredients:
Cooking Instructions:
Phase 1: Preparing the Gelatin Base
1. In a medium bowl, dissolve the lime gelatin completely in the boiling water. Make sure to stir thoroughly for at least two minutes to ensure no granules remain. This step is crucial for a smooth and lump-free dessert. Getting the gelatin fully dissolved will also help the final texture set up beautifully.
2. Stir in the cold water. Now, allow this mixture to cool to room temperature. This is important because if you add the condensed milk while the gelatin is still warm, it can cause the milk to curdle or prevent the dessert from setting properly. Patience here will pay off! You can speed up the cooling process by placing the bowl in an ice bath, but be sure to stir occasionally.
Phase 2: Creating the Creamy Mixture
3. In a separate large bowl, combine the sweetened condensed milk and the fresh lemon juice. Whisk these together until they are well blended. The acid from the lemon juice will react with the condensed milk, thickening it slightly and adding a pleasant tang that balances the sweetness. This mixture will form the creamy, delightful base of our St. Patrick’s Day treat.
4. Once the gelatin mixture has cooled to room temperature, gradually pour it into the condensed milk and lemon juice mixture while whisking continuously. Continue to whisk until everything is smoothly incorporated. At this stage, if you desire a more intense green color, now is the time to add a few drops of green food coloring. Start with just a drop or two and mix well, adding more if needed to achieve your perfect St. Patrick’s Day hue.
Phase 3: Folding and Setting
5. Gently fold in the whipped heavy cream into the green mixture. Be delicate with this step to keep as much air in the cream as possible, which will contribute to a lighter, fluffier texture. You want to incorporate the cream until no streaks remain, but avoid overmixing, which can deflate the whipped cream.
6. Pour the entire mixture into a serving dish or individual parfait glasses. Cover the dish or glasses tightly with plastic wrap. For the best results and a firm set, refrigerate for at least 4 hours, or preferably overnight. The longer it chills, the firmer and more jiggly your delicious St. Patrick’s Day dessert will become. This waiting period is often the hardest part, but the anticnon-alcoholic ipation makes the final treat even more enjoyable!
Phase 4: Garnishing and Serving
7. Before serving, garnish your St. Patrick’s Day dessert with a dollop of extra whipped cream and a sprinkle of festive green sprinkles, if desired. This adds a final touch of flair and makes it even more celebratory. You can also add a mint sprig for an extra pop of freshness and color. Enjoy this delightful green dessert with your loved ones as you celebrate St. Patrick’s Day! It’s a simple yet wonderfully effective way to bring a bit of Irish joy to your table.
Conclusion:
I hope you’ve enjoyed exploring these delightful St. Patrick’s Day dessert recipes! These treats are perfect for adding a touch of festive fun and deliciousness to your celebrations. Whether you’re looking for something visually stunning with vibrant green hues or a comforting, classic flavor with an Irish twist, there’s a recipe here to suit every taste and skill level. They’re wonderfully versatile, making them ideal for family gatherings, potlucks, or even a sweet indulgence just for yourself. Don’t hesitate to get creative with your decorations – think sbeef hamrocks, gold coins, or a sprinkle of edible glitter for that extra sparkle!
Consider serving these St. Patrick’s Day desserts alongside a warm mug of Irish coffee or a creamy non-alcoholic stout for a truly authentic experience. For variations, don’t be afraid to experiment with different extracts like mint or Bailey’s Irish Cream in your batters and frostings. You could also swap out traditional chocolate chips for white chocolate or green-tinted candies. The possibilities are endless! So gather your ingredients, put on some cheerful music, and dive into making these fantastic treats. I encourage you to try at least one of these recipes – your taste buds will thank you!
Frequently Asked Questions:
Can I make these St. Patrick’s Day desserts ahead of time?
Yes, absolutely! Many of these desserts, like cakes, cupcakes, and cookies, can be baked and frosted a day or two in advance. Store them in airtight containers at room temperature or in the refrigerator, depending on the ingredients (especially if they contain cream cheese frosting). This will save you valuable time on St. Patrick’s Day itself.
What if I don’t have green food coloring?
No worries! While green is classic for St. Patrick’s Day, you can still create festive treats. Embrace natural green ingredients like matcha powder for a subtle flavor and color in cakes or cookies. Alternatively, focus on other traditional St. Patrick’s Day colors like gold (using yellow food coloring or edible gold dust) or even brown for chocolate-based desserts. A simple dusting of powdered sugar can also look elegant.
Are these recipes suitable for children to help make?
Definitely! Many of these St. Patrick’s Day desserts are very child-friendly. Tasks like mixing ingredients, stirring, decorating cookies with sprinkles, or helping to spread frosting are perfect for little hands. It’s a wonderful way to create lasting memories and introduce them to the joy of baking.
St. Patrick’s Day Dessert Collection
A delightful assortment of festive St. Patrick’s Day themed desserts, perfect for celebrating the holiday.
Ingredients
-
1 cup all-purpose flour
-
1/2 cup granulated sugar
-
1/4 cup unsalted butter, softened
-
1 large egg
-
1 teaspoon vanilla extract
-
1/2 cup finely chopped mint leaves
-
1/4 cup cream cheese, softened
-
2 tablespoons powdered sugar
-
1/4 teaspoon peppermint extract
-
Green food coloring
Instructions
-
Step 1
For the cookies: Cream together butter and sugar until light and fluffy. Beat in the egg and vanilla extract. -
Step 2
Gradually add flour to the wet ingredients and mix until just combined. Stir in the finely chopped mint leaves. -
Step 3
Drop spoonfuls of dough onto a baking sheet lined with parchment paper. Bake at 350°F (175°C) for 10-12 minutes, or until edges are lightly golden. -
Step 4
For the frosting: Beat together cream cheese and powdered sugar until smooth. Add peppermint extract and a few drops of green food coloring, mixing until desired shade is reached. -
Step 5
Once cookies have cooled completely, spread or pipe the green frosting onto them. -
Step 6
Optionally, garnish with more finely chopped mint leaves or festive sprinkles.
Important Information
Nutrition Facts (Per Serving)
It is important to consider this information as approximate and not to use it as definitive health advice.
Allergy Information
Please check ingredients for potential allergens and consult a health professional if in doubt.