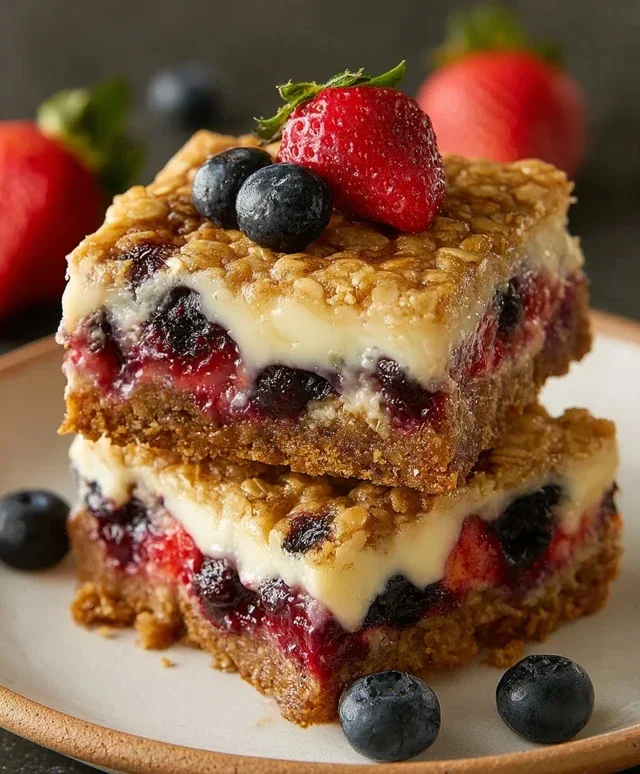
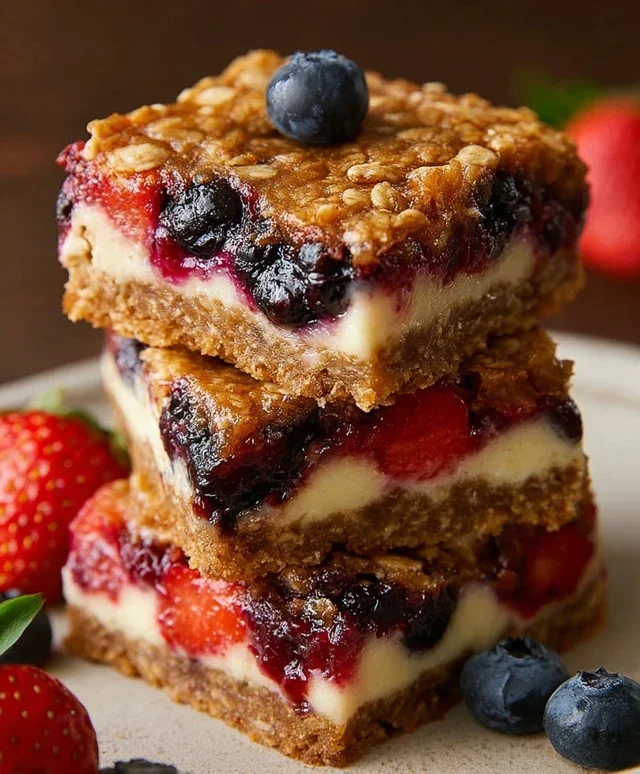
Berry Oatmeal Cheesecake Bars Recipe
Berry Oatmeal Cheesecake Bars are the ultimate treat that perfectly marries comforting breakfast flavors with decadent dessert indulgence. Imagin extracte this: a buttery, slightly chewy oatmeal crust, reminiscent of your favorite morning bowl, forming the perfect foundation for a lusciously creamy cheesecake filling. Then, we swirl in a vibrant medley of fresh berries, their tartness cutting through the richness and adding bursts of delightful color and flavor. It’s a combination that simply sings! We love Berry Oatmeal Cheesecake Bars because they hit that sweet spot between wholesome and utterly irresistible. They’re fantastic for a weekend brunch, a satisfying afternoon pick-me-up, or even as a surprisingly delightful dessert. The textural contrast between the crum extractbly oatmeal base and the smooth, tangy cheesecake is truly what makes these Berry Oatmeal Cheesecake Bars so special, offering a sophisticated yet wonderfully approachable bite every single time.
Berry Oatmeal Cheesecake Bars
These Berry Oatmeal Cheesecake Bars are the perfect marriage of comforting oatmeal cookie and decadent cheesecake. Imagin extracte a chewy, spiced oatmeal base, topped with a creamy, tangy cheesecake layer swirled with sweet, juicy strawberries and pockets of melted white chocolate. They’re surprisingly easy to make and absolutely irresistible. Whether you’re looking for a new brunch treat, a delightful dessert, or just a way to satisfy a sweet craving, these bars are sure to become a fast favorite. The combination of textures and flavors is simply divine – the crisp edges of the oat base, the soft, yielding cheesecake, and the bursts of fresh berry goodness.
Ingredients:
Instructions:
Making the Oatmeal Base:
1. Preheat your oven to 350°F (175°C). Lightly grease and line an 8×8 inch baking pan with parchment paper, leaving an overhang on the sides. This will make it much easier to lift the bars out once they’re cooled. In a medium bowl, whisk together the all-purpose flour, baking soda, ground cinnamon, and salt. This ensures that all the dry ingredients are evenly distributed, which is crucial for a consistent texture. Set this bowl aside.
2. In a large bowl, cream together the softened unsalted butter, packed light brown sugar, and sugar until the mixture is light and fluffy. This step is key for a tender cookie base. You can use an electric mixer for this, or a sturdy whisk and some elbow grease. Beat in the two large eggs, one at a time, ensuring each is fully incorporated before adding the next. Then, stir in the vanilla extract.
3. Gradually add the dry ingredients to the wet ingredients, mixing until just combined. Be careful not to overmix at this stage; overmixing can develop the gluten in the flour too much, resulting in a tough cookie base. Finally, stir in the uncooked quick cook oats. The mixture will be thick and slightly crum extractbly. Press about two-thirds of this oat mixture evenly into the bottom of your prepared baking pan. Make sure to get it into the corners and create a nice, even layer.
Crafting the Cheesecake Filling:
4. In a separate medium bowl, beat the softened cream cheese and 1/2 cup of sugar together until smooth and creamy. It’s important that the cream cheese is truly softened (not melted, but pliable) for a lump-free filling. Beat in the remaining egg yolk (from the divided large egg). If you used a whole egg in the oatmeal base, you’ll use one whole egg here for the cheesecake. Stir in 1 teaspoon of the vanilla extract. Gently fold in the white chocolate chips and the chopped strawberries. Don’t overmix; you want to keep the integrity of the fruit and chocolate.
Assembling and Baking the Bars:
5. Dollop spoonfuls of the cheesecake mixture evenly over the oat base in the pan. You don’t need to be precise here; the rustic look is part of the charm! Then, crum extractble the remaining one-third of the oat mixture over the top of the cheesecake layer. This creates that delightful craggy topping. If you have any leftover strawberries or white chocolate chips, you can sprinkle them on top as well for extra visual appeal and flavor.
6. Bake in the preheated oven for 30-35 minutes, or until the edges of the cheesecake are set and slightly puffed, and the oat topping is golden brown. The center of the cheesecake may still have a slight wobble, which is perfectly normal – it will continue to set as it cools. Let the bars cool completely in the pan on a wire rack. This is a crucial step; patience will be rewarded with clean cuts and perfectly set bars. Once cooled, use the parchment paper overhang to lift the entire slab out of the pan. For the cleanest slices, chill the bars in the refrigerator for at least 1-2 hours before cutting them into squares. Enjoy!
Conclusion:
These Berry Oatmeal Cheesecake Bars are an absolute triumph! They perfectly balance the creamy, tangy richness of cheesecake with the comforting, hearty chegrape juicess of an oatmeal crust, all brightened by the burst of fresh berries. Whether you’re looking for a show-stopping dessert for a gathering or a delightful treat to brighten your afternoon, these bars deliver. Their versatility makes them a year-round favorite, and I’m confident you’ll love them as much as I do.
For serving, I highly recommend a dollop of fresh whipped cream or a sprinkle of powdered sugar. They are also delicious served slightly warm or chilled. If you’re feeling adventurous, consider adding a swirl of lemon zest to the cheesecake filling for an extra zing, or swapping out the berries for other seasonal fruits like peaches or cherries.
Don’t hesitate to give these Berry Oatmeal Cheesecake Bars a try. They are surprisingly simple to make and the results are incredibly rewarding. You’ll be amazed at how quickly they disappear!
Frequently Asked Questions:
Can I use frozen berries instead of fresh?
Absolutely! Frozen berries work wonderfully. If using frozen, toss them with a tablespoon of flour or cornstarch before adding them to the cheesecake filling to help prevent excess moisture. You may need to bake them a few minutes longer.
How long do these bars keep in the refrigerator?
These bars are best enjoyed within 3-4 days when stored in an airtight container in the refrigerator. They hold their texture and flavor quite well.
Can I make these bars ahead of time?
Yes! You can prepare them a day in advance. Once completely cooled and set, cover them tightly and refrigerate. They are often even better the next day as the flavors meld together.
Berry Oatmeal Cheesecake Bars
A delicious dessert featuring a buttery oatmeal crust, a creamy cheesecake filling, and a swirl of fresh strawberries and white chocolate chips.
Ingredients
-
1 3/4 cups (228g) all-purpose flour
-
1 tsp baking soda
-
3/4 tsp ground cinnamon
-
1/2 tsp salt
-
3/4 cup (168g) unsalted butter, room temperature
-
3/4 cup (168g) packed light brown sugar
-
1/2 cup (104g) sugar
-
2 large eggs
-
2 tsp vanilla extract
-
2 cups (175g) uncooked quick cook oats
-
8 oz cream cheese
-
1/2 cup (104g) sugar
-
1 large egg, divided
-
3/4 cup (127g) white chocolate chips
-
1 1/4 cups chopped strawberries
Instructions
-
Step 1
Preheat oven to 350°F (175°C). Line a 9×13 inch baking pan with parchment paper, leaving an overhang on the sides. -
Step 2
In a medium bowl, whisk together flour, baking soda, cinnamon, and salt. In a large bowl, cream together butter, brown sugar, and 1/2 cup sugar until light and fluffy. Beat in 2 large eggs one at a time, then stir in vanilla extract. -
Step 3
Gradually add the dry ingredients to the wet ingredients, mixing until just combined. Stir in the quick cook oats. Press half of the oat mixture evenly into the bottom of the prepared baking pan. -
Step 4
In a separate bowl, beat the cream cheese until smooth. Beat in the remaining 1/2 cup sugar and the divided large egg until well combined. -
Step 5
Spread the cream cheese mixture evenly over the oat crust. Sprinkle with white chocolate chips and chopped strawberries. -
Step 6
Crumble the remaining oat mixture over the top. Bake for 30-35 minutes, or until the edges are golden brown and the center is set. -
Step 7
Let the bars cool completely in the pan on a wire rack before cutting into squares.
Important Information
Nutrition Facts (Per Serving)
It is important to consider this information as approximate and not to use it as definitive health advice.
Allergy Information
Please check ingredients for potential allergens and consult a health professional if in doubt.