Easy Strawberry Cobbler Recipe- Best Dessert Ever
Strawberry cobbler is more than just a dessert; it’s a warm hug in a bowl, a burst of pure summer joy that can transport you back to childhood with every sweet, tangy bite. There’s something undeniably magical about the way plump, sun-ripened strawberries, kissed with a touch of sugar and maybe a squeeze of lemon, are nestled beneath a blanket of tender, biscuit-like topping. This is the kind of dessert that brings people together, that makes gatherings feel instantly more festive and comforting. What makes strawberry cobbler truly special is its effortless charm. It doesn’t require fussy techniques or exotic ingredients. Instead, it celebrates the simple, vibrant flavors of fresh fruit, elevated by a rustic, golden crust that offers the perfect textural contrast. It’s a classic for a reason, and I’m so excited to share my favorite way to make this delightful strawberry cobbler with you!

Strawberry Cobbler
There’s something undeniably comforting about a warm, bubbling cobbler, especially when it’s bursting with the sweet, slightly tart flavor of fresh strawberries. This strawberry cobbler recipe is a delightful classic, bringin extractg together simple ingredients for a dessert that’s both elegant and wonderfully rustic. The juicy berries are bathed in a light, lemony sauce, and topped with a tender, slightly crisp biscuit-like topping. It’s the perfect finnon-alcoholic ale to a summer meal, or a welcome treat any time of year when you’re craving a taste of sunshine. The beauty of cobbler lies in its forgiving nature; it’s a dessert that celebrates imperfections and emphasizes deliciousness. Whether you’re a seasoned baker or a begin extractner, this recipe is designed to be straightforward and rewarding, promising a golden, bubbly delight.
Ingredients:
Cooking Instructions
Let’s get started on this delightful strawberry cobbler! The process is divided into two main parts: preparing the strawberry filling and then creating that irresistible biscuit topping.
Preparing the Strawberry Filling
1. In a medium bowl, combine the 1/2 cup of white sugar and the 2 Tablespoons of cornstarch. Whisk these together until they are well incorporated. This dry mixture is essential for thickening the strawberry juices, preventing a watery cobbler and creating a luscious, syrupy consistency.
2. Add the 1/4 cup of lemon juice to the sugar and cornstarch mixture. Stir until a smooth paste forms. The lemon juice not only adds a bright, complementary tang that cuts through the sweetness of the berries but also helps the cornstarch dissolve evenly, further ensuring a smooth, lump-free sauce.
3. Gently fold in the 3 cups of fresh, hulled, and sliced strawberries. Ensure each strawberry slice is coated with the lemon-sugar mixture. Take your time here; we want to coat all those beautiful berries without mashing them. The goal is to let them macerate slightly, releasing some of their natural juices.
4. Pour this strawberry mixture into an 8×8 inch baking dish or a similar-sized oven-safe skillet. Spread the berries out evenly. Now, take the 2 Tablespoons of diced cold butter and dot them over the top of the strawberries. These little pockets of butter will melt as the cobbler bakes, adding richness and a subtle savory note to the sweet berry filling.
Creating the Biscuit Topping
5. In a separate medium bowl, whisk together the 1 cup of all-purpose flour, 1 Tablespoon of white sugar, 1 1/2 Teaspoons of baking powder, and 1/2 Teaspoon of salt. This dry base forms the foundation of our delightful topping. The baking powder is crucial for lift, ensuring our topping is light and fluffy, not dense.
6. Add the 3 Tablespoons of cold butter, cut into cubes, to the dry ingredients. Using a pastry blender, two knives, or your fingertips, cut the butter into the flour mixture until it resembles coarse crum extractbs, with some pea-sized pieces of butter still visible. These butter pieces are key to creating a tender, flaky topping – they melt during baking, creating steam pockets. It’s important that the butter is cold to achieve this effect.
7. Pour in the 1/2 cup of heavy cream. Stir just until the ingredients are moistened and a shaggy dough forms. Be careful not to overmix, as this can result in a tough topping. The dough will be sticky, and that’s perfectly fine.
8. Drop spoonfuls of this biscuit dough over the top of the strawberry filling. You don’t need to cover the entire surface perfectly; rustic is good here. The dough will spread slightly as it bakes.
Baking Your Cobbler
9. Preheat your oven to 375 degrees Fahrenheit (190 degrees Celsius). Place the assembled cobbler on a baking sheet (to catch any potential drips) and bake for 30-35 minutes, or until the topping is golden brown and the strawberry filling is bubbling vigorously around the edges. The aroma that will fill your kitchen is simply heavenly!
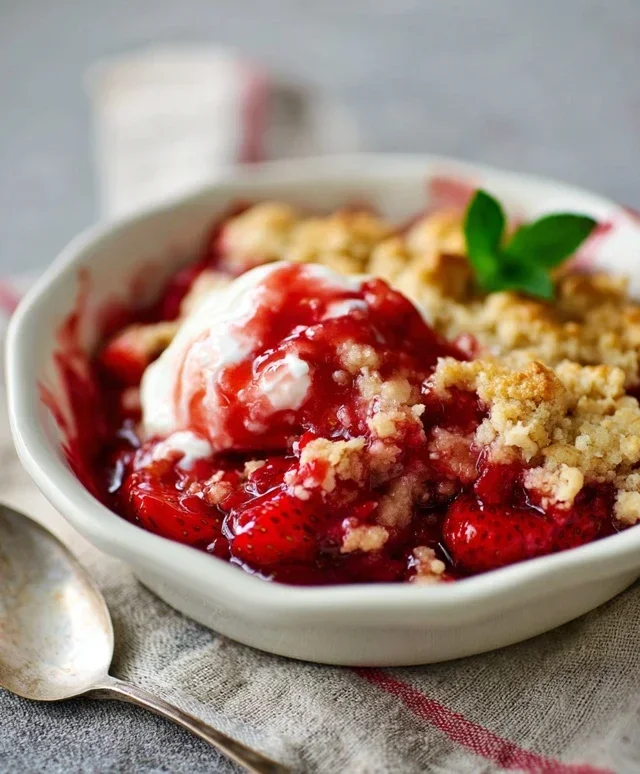
10. Let the cobbler cool for at least 10-15 minutes before serving. This allows the filling to set up properly, making it easier to serve and preventing you from burning your mouth on molten berry goodness. Serve warm, perhaps with a scoop of vanilla ice cream or a dollop of whipped cream. Enjoy this delightful taste of homemade comfort!
Conclusion:
There you have it! This strawberry cobbler recipe is truly a gem. It’s wonderfully simple to whip up, making it perfect for any skill level, yet the result is a deeply satisfying dessert that bursts with fresh strawberry flavor. The tender, buttery biscuit topping, baked to a golden perfection, creates a delightful contrast with the warm, juicy fruit underneath. It’s the kind of dessert that brings smiles to faces and warm feelings to the table, proving that comfort food doesn’t need to be complicated. I truly encourage you to give this strawberry cobbler a try – you won’t regret it!
For serving, this cobbler shines best when it’s warm. A scoop of vanilla bean ice cream melting into the warm fruit is classic for a reason, but a dollop of freshly whipped cream or even a drizzle of sweetened condensed milk also works beautifully. Don’t be afraid to experiment with variations! You could add a sprinkle of cinnamon to the topping for a bit of spice, or perhaps fold in some fresh raspberries or blueberries along with the strawberries for a mixed berry delight. You might even add a touch of lemon zest to the filling for an extra bright note. The possibilities are as endless as your sweet tooth!
Frequently Asked Questions:
Can I use frozen strawberries?
Yes, absolutely! If using frozen strawberries, thaw them first and drain off any excess liquid to prevent the cobbler from becoming too watery. You might also need to adjust the baking time slightly.
How should I store leftover strawberry cobbler?
Store any leftover strawberry cobbler in an airtight container in the refrigerator for up to 3-4 days. Reheat gently in the oven or microwave before serving to enjoy it at its best.
Strawberry Cobbler
A classic and delicious strawberry cobbler with a tender, biscuit-like topping.
Ingredients
-
1/2 cup white sugar
-
2 Tablespoons cornstarch
-
1/4 cup lemon juice
-
3 cups fresh strawberries, hulled and sliced into 1/4 inch slices
-
2 Tablespoons cold butter, diced
-
1 cup all purpose flour
-
1 Tablespoon white sugar
-
1 1/2 Teaspoons baking powder
-
1/2 Teaspoon salt
-
3 Tablespoons cold butter, cut into cubes
-
1/2 cup heavy cream
Instructions
-
Step 1
Preheat oven to 375°F (190°C). -
Step 2
In a large bowl, combine 1/2 cup white sugar, cornstarch, and lemon juice. Add sliced strawberries and toss gently to coat. -
Step 3
Pour the strawberry mixture into an 8×8 inch baking dish. Dot the top of the strawberries with 2 Tablespoons of diced cold butter. -
Step 4
In a separate bowl, whisk together all purpose flour, 1 Tablespoon white sugar, baking powder, and salt. -
Step 5
Cut in 3 Tablespoons of cold butter cubes into the flour mixture until it resembles coarse crumbs. Stir in heavy cream until a soft dough forms. -
Step 6
Drop spoonfuls of the dough over the strawberry mixture in the baking dish. -
Step 7
Bake for 30-40 minutes, or until the topping is golden brown and the strawberry filling is bubbly.
Important Information
Nutrition Facts (Per Serving)
It is important to consider this information as approximate and not to use it as definitive health advice.
Allergy Information
Please check ingredients for potential allergens and consult a health professional if in doubt.