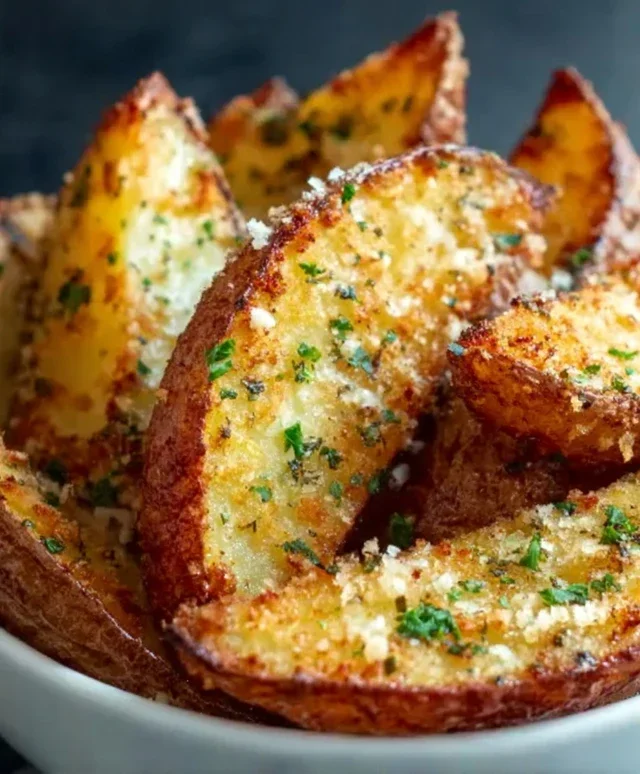
Crispy Baked Garlic Parmesan Potato Wedges
Baked Garlic Parmesan Potato Wedges are, in my humble opinion, one of the most universally loved side dishes, and for good reason. They’re the perfect crispy, savory, and satisfying accompaniment to almost any meal, from a juicy burger to a grilled steak, or even just enjoyed as a hearty snack. What makes these particular Baked Garlic Parmesan Potato Wedges so special? It’s the magical combination of tender, fluffy potato interiors embraced by a golden-brown, oven-baked exterior, all infused with the irresistible aroma of roasted garlic and the sharp, nutty bite of Parmesan cheese. Forget the greasy, deep-fried versions; this baked rendition offers all the flavor and texture with a healthier touch, making them a guilt-free pleasure we can all get behind. Get ready to elevate your potato game with this simple yet incredibly delicious recipe.
Why You’ll Love These
The Ultimate Crispy, Cheesy Potato Perfection
Ingredients:
Baked Garlic Parmesan Potato Wedges
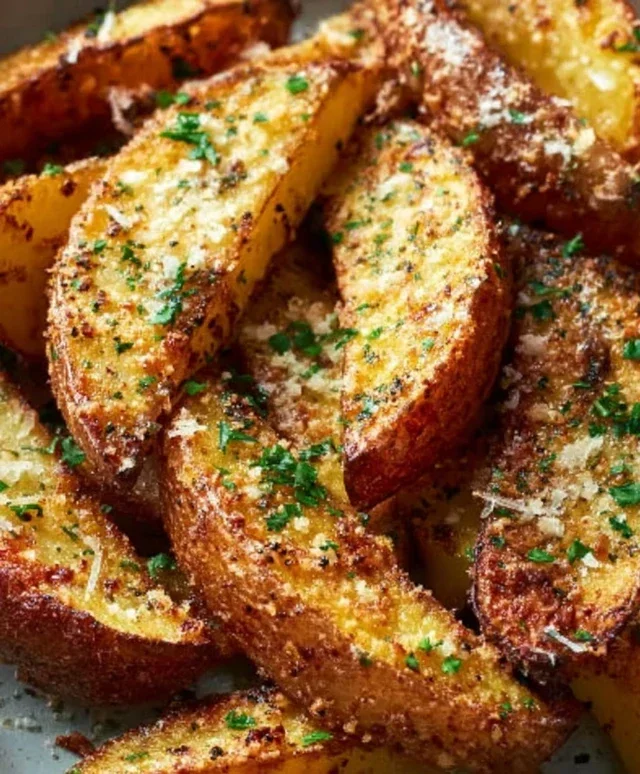
There’s something incredibly satisfying about a perfectly roasted potato wedge. Crispy on the outside, fluffy on the inside, and packed with flavor – it’s a simple side dish that can elevate any meal. Today, we’re diving into how to create these irresistible Baked Garlic Parmesan Potato Wedges right in your own oven. Forget those greasy fast-food versions; these are healthier, tastier, and surprisingly easy to whip up. They’re perfect alongside grilled chicken, burgers, or even as a hearty appetizer with your favorite dipping sauce. Get ready to impress yourself and anyone you share these with!
Preparing the Potatoes: The Foundation of Flavor
The first crucial step to achieving potato perfection lies in the preparation of our star ingredient: the russet potatoes. These starchy wonders are ideal for wedges because they hold their shape well during baking and become wonderfully fluffy inside. We’ll start by thoroughly washing the potatoes under cold running water. Don’t be shy here; we want to remove any dirt or debris. After washing, it’s time to pat them completely dry with paper towels. This step might seem minor, but it’s actually quite important. Excess moisture on the potato skin can steam them rather than roast them, hindering that desirable crispiness we’re after.
Next, we’ll cut each potato into wedges. A good rule of thumb is to cut each potato lengthwise into quarters, and then cut each quarter in half lengthwise again, creating wedges that are roughly ½ to ¾ inch thick. Aim for uniformity in size as much as possible. This ensures that all your wedges cook at roughly the same rate, preventing some from being overcooked and others undercooked. Don’t worry if they aren’t perfectly identical; rustic charm is part of their appeal!
Tossing for Flavor: Coating Your Wedges
Now comes the fun part: infusing our potato wedges with all the delicious seasonings. In a large mixing bowl, we’ll combine the olive oil, salt, garlic powder, and Italian seasoning. The olive oil acts as a binder for our seasonings and also helps to create that beautiful golden-brown crust we’re aiming for. Don’t skimp on the olive oil; it’s essential for achieving that delightful crispiness.
We’ll then add the prepared potato wedges to the bowl. Using your hands or a large spoon, gently toss the potatoes until they are evenly coated with the oil and seasoning mixture. Make sure every single wedge gets a good coating. This is where the magic happens, as each surface will absorb the savory flavors. Once they’re thoroughly coated, we’re ready to move on to the baking sheet.
Arrangin extractg for Optimal Roasting
For the best results, it’s important to give your potato wedges some breathing room on the baking sheet. Overcrowding the pan will lead to steaming, not roasting, and we definitely don’t want that. So, spread the seasoned potato wedges out in a single layer on a large baking sheet. If your baking sheet is too small to accommodate them without touching, it’s better to use two baking sheets. This ensures that hot air can circulate freely around each wedge, promoting even browning and crisping.
You can line your baking sheet with parchment paper or aluminum foil for easier cleanup, though it’s not strictly necessary for the cooking process itself. Some people prefer to bake directly on the metal for a slightly crispier bottom, while others find lining makes post-meal tidying a breeze.
The Baking Process: Turning Potatoes into Gold
Preheat your oven to a robust 400°F (200°C). This higher temperature is key for achieving that coveted crispy exterior. Once the oven is preheated and your potato wedges are neatly arranged on the baking sheet, it’s time to bake.
Place the baking sheet in the preheated oven and bake for approximately 25-35 minutes. Now, this is where vigilance comes in. About halfway through the baking time, around the 15-20 minute mark, you’ll want to carefully remove the baking sheet from the oven. Using a spatula, gently flip each potato wedge over. This ensures that all sides of the wedges get evenly browned and crispy. This simple step makes a significant difference in the final texture and appearance of your wedges.
After flipping, return the baking sheet to the oven for the remaining time. You’re looking for the wedges to be tender when pierced with a fork and golden brown with delightfully crisp edges.
The Grand Finnon-alcoholic ale: A Parmesan Finish
Just when you think we’re done, there’s one last glorious step to take these wedges from delicious to utterly divine: the Parmesan cheese. About 5 minutes before the baking time is complete, carefully remove the baking sheet from the oven. Sprinkle the ½ cup of shredded Parmesan cheese evenly over the potato wedges. The residual heat from the baking potatoes will help melt and toast the cheese, creating a delectable cheesy crust.
Return the baking sheet to the oven for the final 5 minutes of baking. Watch closely during this last stage, as the Parmesan can brown and crisp up quite quickly. You want it melted and slightly golden, not burnt. Once the Parmesan is beautifully melted and lightly toasted, remove the baking sheet from the oven.
Let the Baked Garlic Parmesan Potato Wedges cool on the baking sheet for a few minutes before serving. This allows them to firm up slightly and makes them easier to handle. Serve them hot, and be prepared for them to disappear fast! They are fantastic on their own, but also pair wonderfully with a dollop of sour cream, a side of ketchup, or your favorite aioli for dipping. Enjoy this simple yet incredibly flavorful treat!
Conclusion:
There you have it! My recipe for Baked Garlic Parmesan Potato Wedges is a guaranteed crowd-pleaser. These wedges are incredibly easy to make, boasting a crispy exterior and a fluffy, tender interior, all infused with the irresistible flavors of garlic and Parmesan cheese. It’s the perfect side dish that elevates any meal without adding a lot of fuss. I love how versatile they are; they’re fantastic served alongside grilled chicken, juicy burgers, a fresh salad, or even as a standalone snack. Don’t hesitate to experiment with variations! You can add a pinch of cayenne pepper for a little heat, sprinkle in some dried herbs like rosemary or thyme, or even toss them with a drizzle of truffle oil after baking for an extra touch of luxury. I truly encourage you to give these Baked Garlic Parmesan Potato Wedges a try. You won’t be disappointed!
Frequently Asked Questions:
Why are my potato wedges not crispy?
To ensure maximum crispiness, make sure your potatoes are cut into relatively uniform wedges. Pat them thoroughly dry with paper towels after cutting to remove excess moisture, which is key to achieving that desirable crunch. Also, avoid overcrowding the baking sheet; give the wedges enough space for air to circulate around them. Baking at a slightly higher temperature, around 425°F (220°C), can also help.
Can I use different types of potatoes?
Absolutely! While Russet potatoes are excellent for their starch content and fluffy interior, you can certainly use Yukon Gold or red potatoes. They will yield a slightly creamier texture but are still delicious. Just adjust the baking time slightly if needed, as denser potatoes might take a few minutes longer to become tender.
How can I make these vegan?
To make these vegan-friendly, simply omit the Parmesan cheese. You can achieve a similar savory and cheesy flavor by using nutritional yeast. Toss the wedges with nutritional yeast along with the garlic, oil, and seasonings before baking. It provides a wonderful umami depth that complements the garlic beautifully.
Baked Garlic Parmesan Potato Wedges
Crispy and flavorful potato wedges coated in garlic, parmesan, and herbs, baked to perfection.
Ingredients
-
3-4 large russet potatoes, cut into wedges
-
4 tablespoons olive oil
-
2 teaspoons salt
-
2 teaspoons garlic powder
-
2 teaspoons Italian seasoning
-
½ cup shredded parmesan cheese
Instructions
-
Step 1
Preheat oven to 400°F (200°C). Line a baking sheet with parchment paper. -
Step 2
Wash and cut the russet potatoes into wedges. Pat them completely dry with paper towels. -
Step 3
In a large bowl, toss the potato wedges with olive oil, salt, garlic powder, and Italian seasoning until evenly coated. -
Step 4
Arrange the seasoned potato wedges in a single layer on the prepared baking sheet. -
Step 5
Bake for 20 minutes, then flip the wedges. -
Step 6
Sprinkle the shredded parmesan cheese over the wedges and bake for another 10-15 minutes, or until golden brown and crispy. -
Step 7
Serve hot.
Important Information
Nutrition Facts (Per Serving)
It is important to consider this information as approximate and not to use it as definitive health advice.
Allergy Information
Please check ingredients for potential allergens and consult a health professional if in doubt.