Easily Freeze Peaches – Your Perfect Summer Fruit
Freezing peaches is a game-changer for any fruit lover, especially when those glorious summer days are fading and the juicy sweetness of ripe peaches is too precious to lose. Imagin extracte this: you’ve hit the jackpot at the farmer’s market, your kitchen is overflowing with fragrant, sun-kissed peaches, and you just can’t bear the thought of them going to waste. That’s where the magic of freezing peaches comes in! It’s a simple, rewarding process that allows you to savor that pure, unadulterated peach flavor all year round. Forget those mushy, flavorless imposters you might find in the grocery store during off-season. When you freeze peaches properly, you lock in their vibrant taste and delightful texture, making them perfect for pies, smoothies, cobblers, or even just enjoying straight from the freezer on a chilly morning. What makes this method so special is its simplicity – no fancy equipment, just a little bit of prep and a whole lot of future deliciousness.
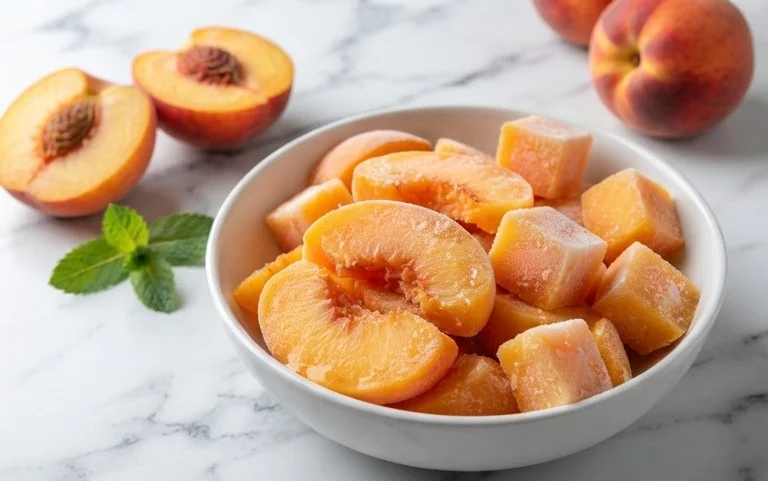
Freezing Peaches: How to Easily Freeze Peaches
There’s nothing quite like the taste of fresh, sun-ripened peaches. But what happens when you have an abundance of this delicious fruit and want to preserve its flavor for months to come? Freezing is an incredibly simple and effective way to capture that peak-season goodness. Whether you’ve scored a great deal at the farmer’s market, your backyard tree is overflowing, or you simply bought more than you could eat, learning how to freeze peaches is a game-changer. This method is straightforward, requires minimal effort, and ensures you’ll have a taste of summer ready for pies, smoothies, cobblers, or just to enjoy straight from the freezer.
Ingredients:
Getting Started: Preparing Your Peaches
The first step in freezing peaches is, of course, selecting the right fruit. You want ripe, but not overly soft or bruised, peaches. Slightly firm peaches are ideal because they hold their shape better during the freezing process. Wash your peaches thoroughly under cool running water to remove any dirt or residue.
Step 1: Peeling and Halving Your Peaches
Once your peaches are clean, it’s time to get them ready for freezing. A common way to easily peel peaches is to blanch them. To do this, bring a pot of water to a rolling boil. While the water heats up, prepare an ice bath by filling a large bowl with ice and water. Carefully drop a few peaches at a time into the boiling water for about 30-60 seconds. You’ll see the skins start to loosen. Immediately transfer the blanched peaches to the ice bath. This sudden temperature change makes peeling incredibly simple. The skins should slip right off with your fingers or a small paring knife. Once peeled, halve your peaches and remove the pits. You can slice them into wedges or chunks at this stage, depending on how you plan to use them later. For freezing, uniform sizes are helpful.
Step 2: Preventing Browning with Fruit Protector
Peaches are notorious for browning when exposed to air, which is why using a fruit protector is essential. In a large bowl, gently toss your prepared peach slices or halves with the Fruit Protector. This solution creates a barrier that helps prevent oxidation, keeping your peaches looking as vibrant and delicious as the day you froze them. Make sure each piece is lightly coated. This step is crucial for maintaining the visual appeal and quality of your frozen fruit.
Step 3: Sweetening for Flavor Preservation
Next, we’ll add sugar to sweeten the peaches and further aid in preservation. Sprinkle the sugar over the coated peaches. Gently toss again to ensure the sugar is evenly distributed. The sugar not only adds sweetness but also helps protect the fruit’s texture and color as it freezes. The amount of sugar can be adjusted slightly to your preference, but this ratio is a good starting point. If you prefer to freeze peaches without added sugar, you can skip this step, but be aware that the texture might be slightly softer upon thawing.
Step 4: Packagin extractg for Freezing
Now it’s time to package your peaches for their journey into the freezer. You have a couple of excellent options here. One is to use freezer-safe bags. Lay your peach slices or halves in a single layer on a baking sheet lined with parchment paper. This is called flash freezing, and it’s a fantastic way to prevent the peaches from clumping together. Once they are firm (about 1-2 hours), transfer them to your freezer bags. This makes it easy to grab just the amount of peaches you need for a recipe later. If you’re freezing whole or halved peaches, you can also pack them directly into freezer-safe containers or bags, trying to remove as much air as possible to prevent freezer burn. Squeeze out excess air from bags before sealing them.
Step 5: Labeling and Freezing
The final step is to label your packaged peaches with the date. This is a good habit to get into so you can use your oldest frozen items first. Then, place the bags or containers in your freezer. Properly frozen peaches can last for up to 10-12 months, though they are best enjoyed within the first 6-8 months for optimal flavor and texture.
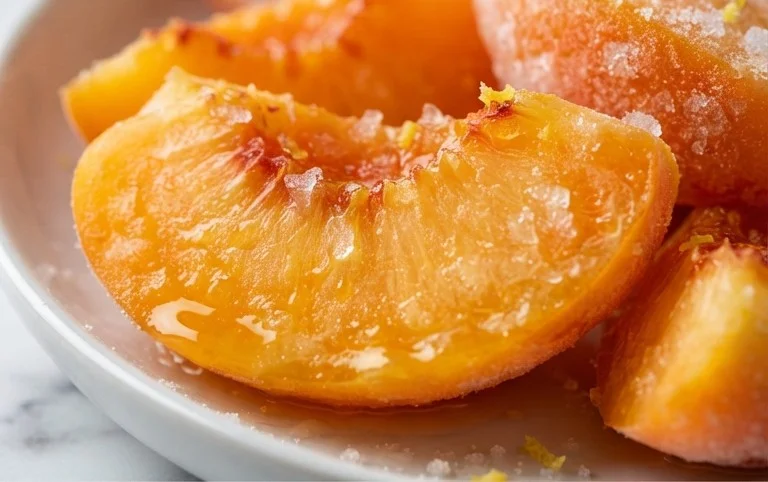
Enjoy your summer-fresh peaches all year round! They are perfect for adding to your morning oatmeal, blending into smoothies, or baking into delicious desserts.
Conclusion:
You’ve now learned just how easy it is to freeze peaches, a fantastic way to preserve the sweet, sun-ripened flavor of this beloved fruit for enjoyment year-round. This method is incredibly straightforward, requiring minimal effort and just a few essential supplies. By properly preparing and freezing peaches, you’re ensuring you’ll have delicious peaches ready for all your culinary creations, from smoothies and cobblers to pies and delightful morning parfaits, long after the summer season has passed. The beauty of this technique lies in its simplicity and the incredible versatility it unlocks. Don’t hesitate to try freezing peaches yourself; it’s a rewarding process that will allow you to savor the taste of summer whenever the craving strikes.
Consider adding a splash of lemon juice to your peach slices before freezing for an extra bright flavor, or even a sprinkle of sugar or honey for a sweeter base, especially if you plan on using them in desserts. This method is truly a game-changer for any peach lover!
Frequently Asked Questions about Freezing Peaches:
Q1: How long can I expect frozen peaches to last?
When frozen properly using the methods outlined, you can expect your delicious frozen peaches to maintain their quality and flavor for approximately 8-12 months. Make sure they are stored in airtight containers or freezer bags to prevent freezer burn and maintain optimal freshness.
Q2: Can I freeze peaches with the skin on?
While it’s technically possible, it’s highly recommended to peel your peaches before freezing. The skin can become tough and unappealing after thawing, detracting from the overall texture and enjoyment of your frozen peaches. Blanching them briefly in hot water makes peeling significantly easier.
How to Easily Freeze Peaches
A simple method to preserve fresh peaches by freezing them, perfect for year-round enjoyment in pies, smoothies, and more.
Ingredients
-
1 quart peaches, peeled, pitted, and sliced
-
2/3 cup granulated sugar
-
3 teaspoons fruit protector
-
1 tablespoon lemon juice
-
1/4 teaspoon ascorbic acid (optional, for extra color retention)
-
1/2 cup water
Instructions
-
Step 1
Prepare the peaches: Wash, peel, pit, and slice the peaches into desired sizes. Aim for uniform slices for even freezing. -
Step 2
Make the sugar syrup (optional but recommended for quality): In a saucepan, combine sugar and water. Heat gently, stirring until sugar is dissolved. Let cool completely. -
Step 3
Mix with fruit protector: In a large bowl, gently toss the sliced peaches with the fruit protector. If using ascorbic acid, dissolve it in the lemon juice and then mix with the peaches and fruit protector. -
Step 4
Pack for freezing: Place the prepared peach slices in freezer-safe bags or containers. If using syrup, pour enough cooled syrup over the peaches to cover them. -
Step 5
Remove excess air: If using bags, press out as much air as possible before sealing to prevent freezer burn. Leave a small headspace if using containers. -
Step 6
Freeze: Place the sealed bags or containers in a single layer on a baking sheet in the freezer until frozen solid. Once frozen, they can be stored more compactly.
Important Information
Nutrition Facts (Per Serving)
It is important to consider this information as approximate and not to use it as definitive health advice.
Allergy Information
Please check ingredients for potential allergens and consult a health professional if in doubt.